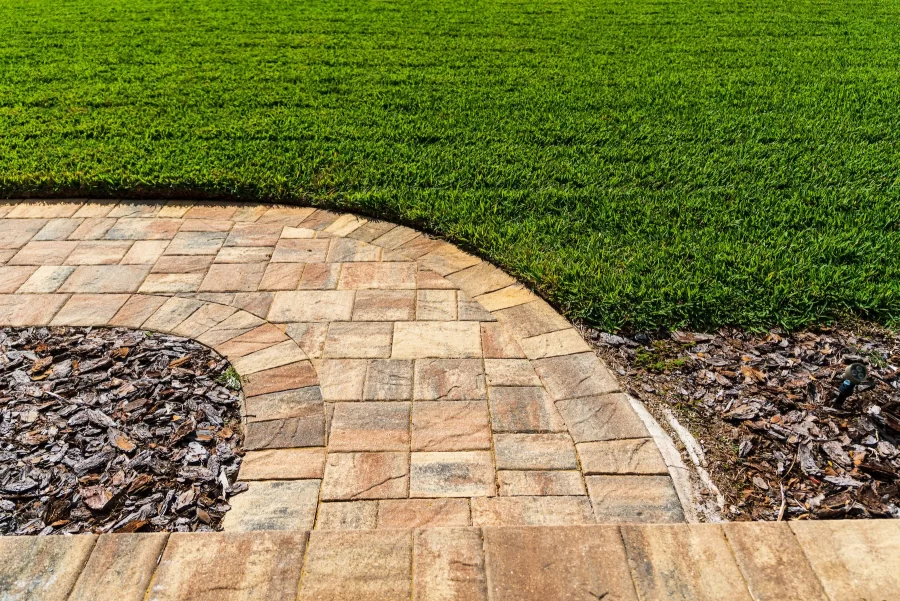
Would you want pavers for more uses and to improve the appearance of your outdoor area? Using pavers for hardscaping will help your yard or patio look nicer and more functional, providing a terrific location for leisure and enjoyment.
This manual will walk you through the necessary actions to organize and execute a well-executed paver hardscaping project.
From choosing the correct materials to ensuring the task is completed correctly, you will learn everything you need to create a stunning outside space that will last.
1. Planning Your Hardscaping Project
Planning is the foundation of a successful hardscaping project. Start by stating the aim of your space. Are you imagining a fresh patio for events, a walkway your guests may follow through your yard, or a robust driveway?
Consider the space’s purpose, your house’s design, and how the pavers might accentuate your surroundings. Luckily, hardscaping with pavers allows several design options and enhances your outdoor area’s visual appeal and functionality.
Then, create a thorough and detailed sketch or blueprint with the layout information. This visual guide will enable you to view the outcome and identify potential difficulties early on. Consider sunshine and drainage that might affect the design and material selection. Making forward plans guarantees a better installation process and lowers the possibility of expensive blunders.
Expert landscape designers say that a well-considered plan guarantees a seamless installation procedure and helps to prevent expensive blunders. A thorough plan allows you to correctly estimate the required quantities of resources, reduce waste, and save money.
2. Choosing the Right Pavers
Choosing the correct pavers is crucial for achieving both aesthetic appeal and utility. Concrete, brick, and natural stone are just a few of the materials pavers are made from; each has a unique advantage. Concrete pavers are versatile, durable, and cost-effective, making them popular for many projects.
While natural stone pavers have a unique, high-end beauty and excellent durability, brick pavers give a classic, timeless aspect. Even with all these characteristics, you must consider the local climate while choosing. For example, select pavers that can withstand freeze-thaw cycles without cracking if your area is prone to low temperatures.
Also, consider the overall look of your house and how different pavers might fit your current design.
This point is backed up by research. It’s best to choose pavers depending on their durability and fit for the particular use. For driveways, for example, interlocking concrete pavers are highly encouraged because of their strength and stability.
3. Preparing the Site
Ensuring a seamless paver installation depends mostly on proper site preparation. Clear the area first of any old pavement materials, weeds, current grass, or trash. This provides a clean slate for your new pavers. Then, considering the pavers’ width and required base layers, dig the site to the proper depth.
Lay a gravel base layer to create stability and facilitate drainage. Add sand over the gravel to provide the pavers with a level and smooth surface. Ensuring the base is properly compacted and at the right level is crucial for preventing future issues such as uneven settling or shifting of the pavers.
4. Laying the Pavers
With your base prepared, you can begin laying the pavers. Start by laying the pavers in your selected design or pattern, ensuring you leave even spaces between them. Use spacers to maintain consistent spacing and alignment. Starting from one end, work across the area, changing as needed to maintain a consistent pattern.
Tap every paver into place using a rubber mallet to guarantee they are level and tightly set. As you work to prevent mistakes that can compromise the hardscape’s ultimate appearance and utility, often verify the alignment and levelness.
The Home Builders Association stresses the need for precise installation for a professional finish. Ensuring level placement and using spacers help produce a uniform surface and prevent future problems.
5. Compaction and Joint Filling
After laying all the pavers, it’s time for compaction and joint filling. Use a plate compactor to firmly set the pavers and ensure they are securely in place. The compaction procedure fills any gaps and locks the pavers together.
After compacting, distribute joint sand over the area and sweep it into the pavers with a broom. This sand reduces movement, grounds the pavers, and fills the joints. Spray the area with water to gently settle the sand and increase its efficacy. Let the area completely dry to help seal the sand in place and provide a strong finish.
Research emphasizes that the durability of paver placement depends critically on proper compaction and joint filling. This procedure reduces the possibility of weeds and movement and helps lock the pavers in place.
6. Maintenance and Care
Maintaining your paver installation is essential for preserving its appearance and longevity. Frequent surface cleaning helps to eliminate dirt and trash that may otherwise lead to discoloration or erosion. Every few years, reseal the pavers to guard against aging, stains, and impacts of hard use.
To stop more damage, rapidly fix any problems, including moving pavers or cracks. Regular maintenance keeps your hardscape looking fresh and increases its lifespan. This ensures that your investment keeps enhancing your outside area for many years.
Conclusion
Successfully planning a hardscaping job with pavers requires careful design, material selection, and proper installation. Following these guidelines and being meticulous can help you design a lovely, functional outdoor space that improves your house. Spend time planning and maintaining your paver installation, then enjoy years of benefits from a well-made hardscape. Ready to makeover your area? Plan your paver work today.
Also Read: 5 Tips To Fix Garage Door Side Gaps